Web to Print Portal Help Center

Ordering Single-Sided Business Cards
- 1 View
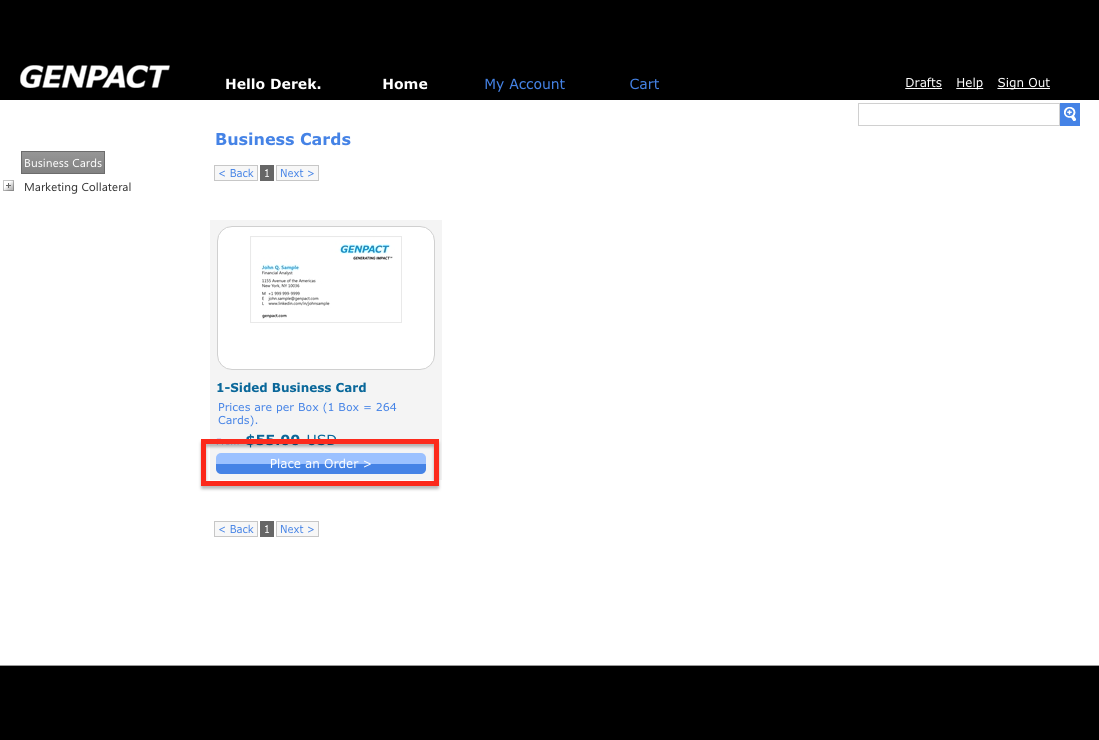
ScreenshotSelect the ProductTo place an order for Single-Sided Business Cards, click on the Business Cards product group on the left side of the screen and then click the Place an Order button on the 1-Sided Business Card product.
- 2 View
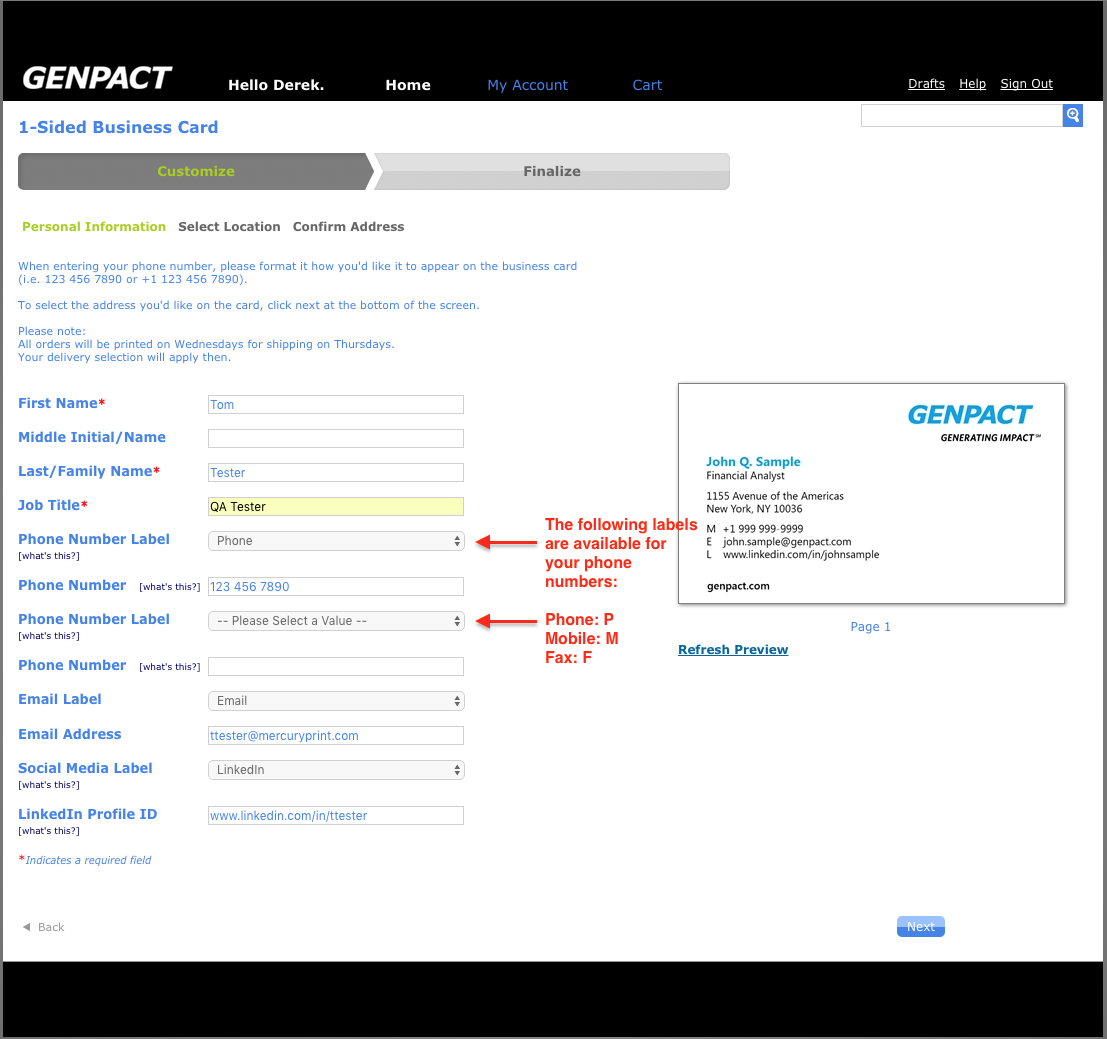
ScreenshotConfirm/Fill Out Your Personal InformationIf you have filled out the Personal Information page of the My Account section, then the information you've saved there will be auto-filled on this page. The following information is currently used by this business card design: 1. First, Middle Initial & Last Name 2. Job Title (the design allows for one line of job titles only) 3. Phone Number 4. Mobile Number (this is labeled as Phone Number so that any number can be entered here) 5. Email Address 6. LinkedIn Profile ID (this can be copied from your LinkedIn profile page if you have one.) Additionally, you can set a tag for each of the phone numbers, email address and LinkedIn profile if you choose to use them. When you are done entering the information you'd like to display on the card, click the Next button
 .
. - 3 View
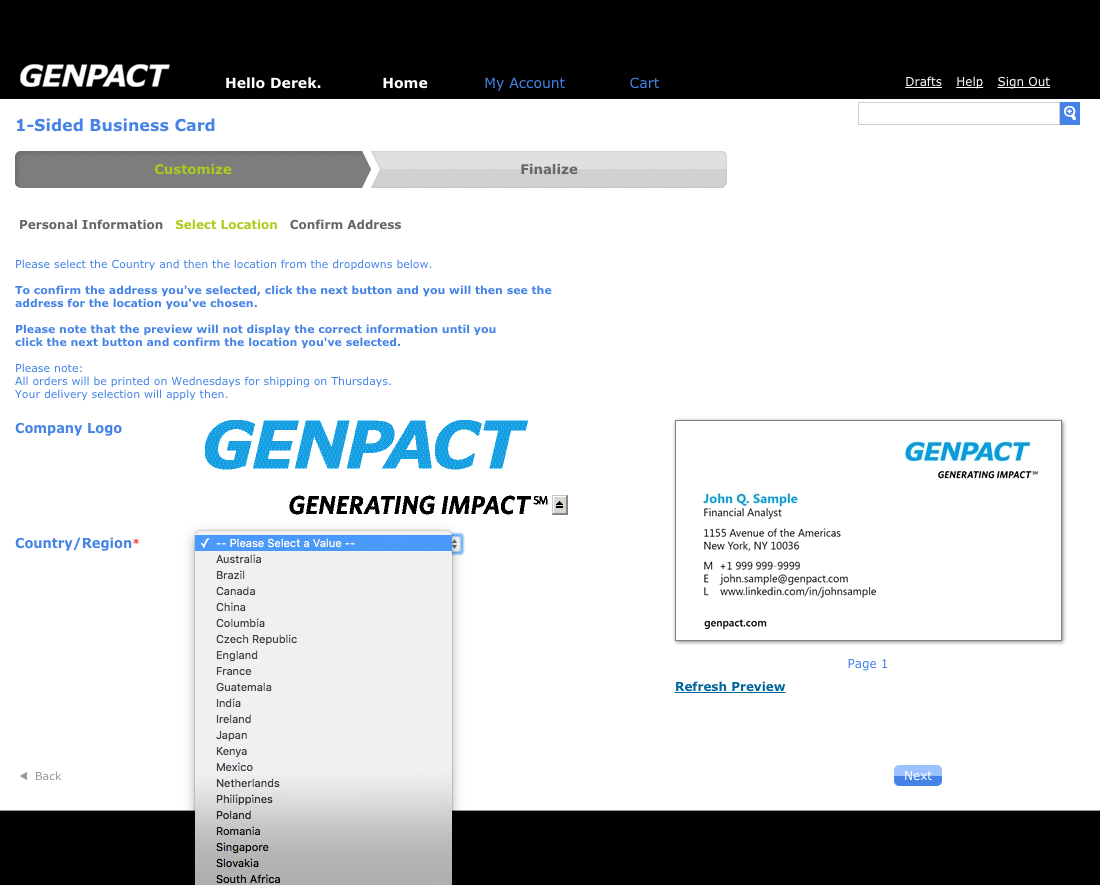
ScreenshotSelect the Country/RegionOn the Select Location page, you can first select the logo you would like to display on the business card under the Company Logo section. Next, you will select a Country/Region from the dropdown menu.
- 4 View
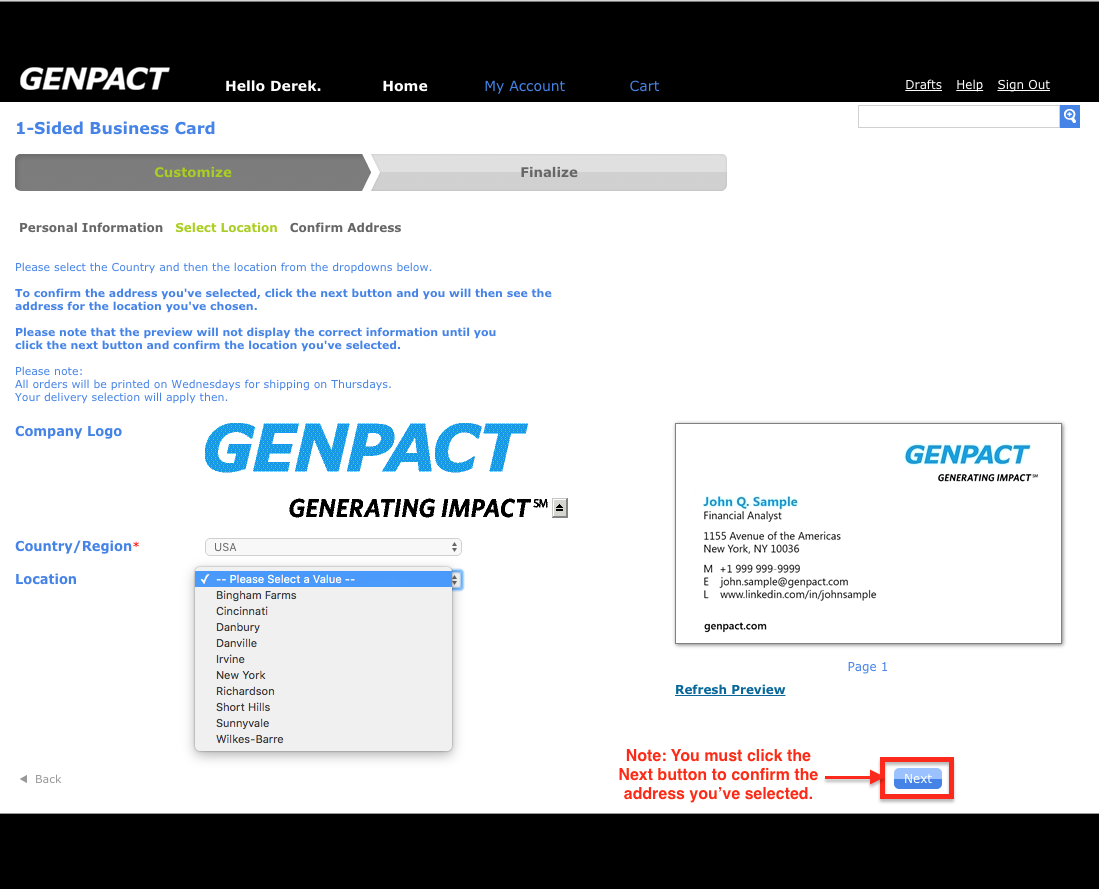
ScreenshotChoose LocationBased on the Country/Region you selected, only the Locations for that Region will be displayed. When you have selected the location, click the Next button
to lock in your selection and move to the Verify Address page.
Please note:
The preview will not display the address you've selected on this page correctly until you click the next button. - 5 View
ScreenshotVerify/Edit the AddressYou will now be able to see the Address Line 1 & 2 for the Location you chose on the previous screen. If you'd like to make any changes, please feel free to do so on each line. The refresh preview will now display the correct information on the card. Click the Next button when you are satisfied with the results.
- 6 View
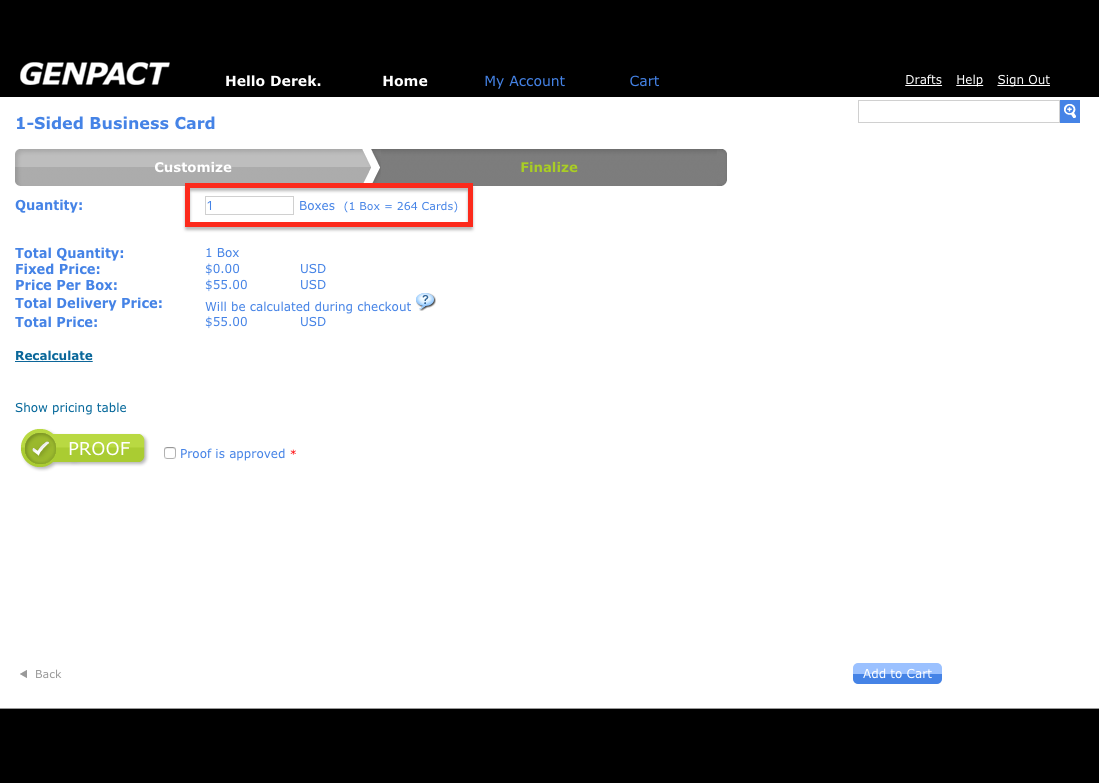
ScreenshotEnter Quantity DesiredPlease enter how many boxes of cards you'd like to purchase in the Quantity field.
- 7 View
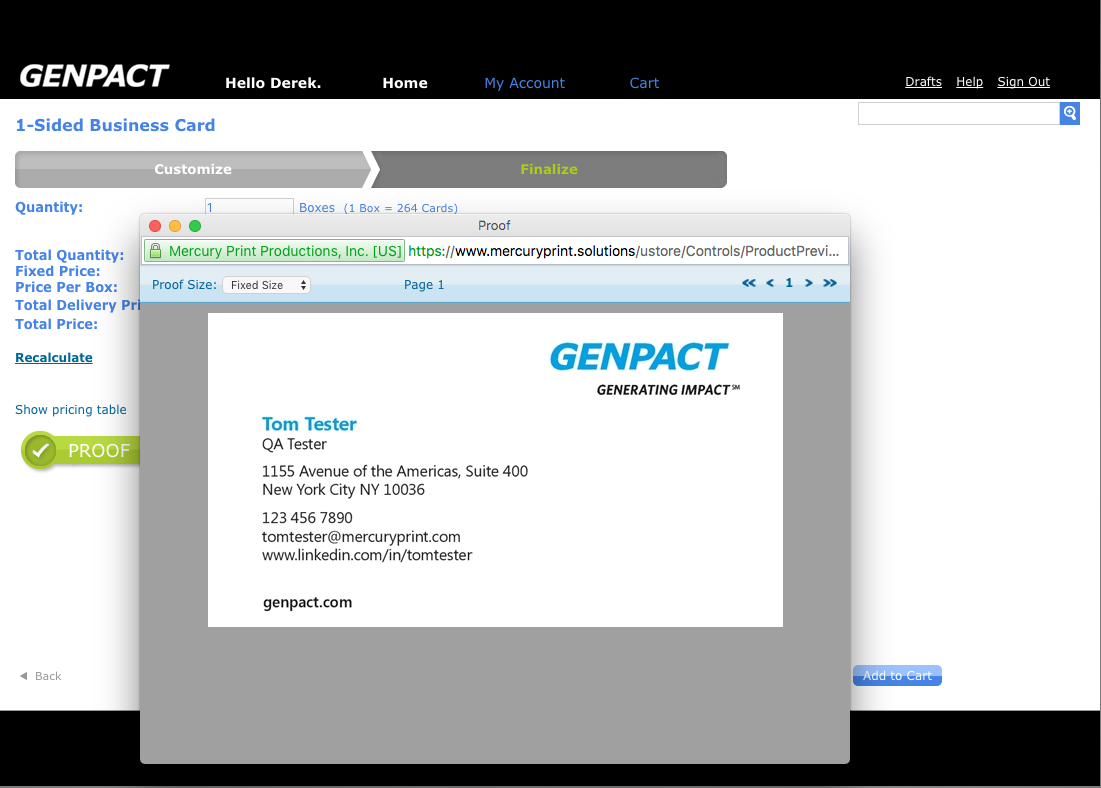
ScreenshotConfirm the ProofYou will also be required to view the Proof by clicking on the Proof button, and then clicking the checkbox labeled "Proof is approved". You will not be able to continue with the order until you have confirmed the proof of the card. Once you care done, click on the Add to Cart button.
- 8 View
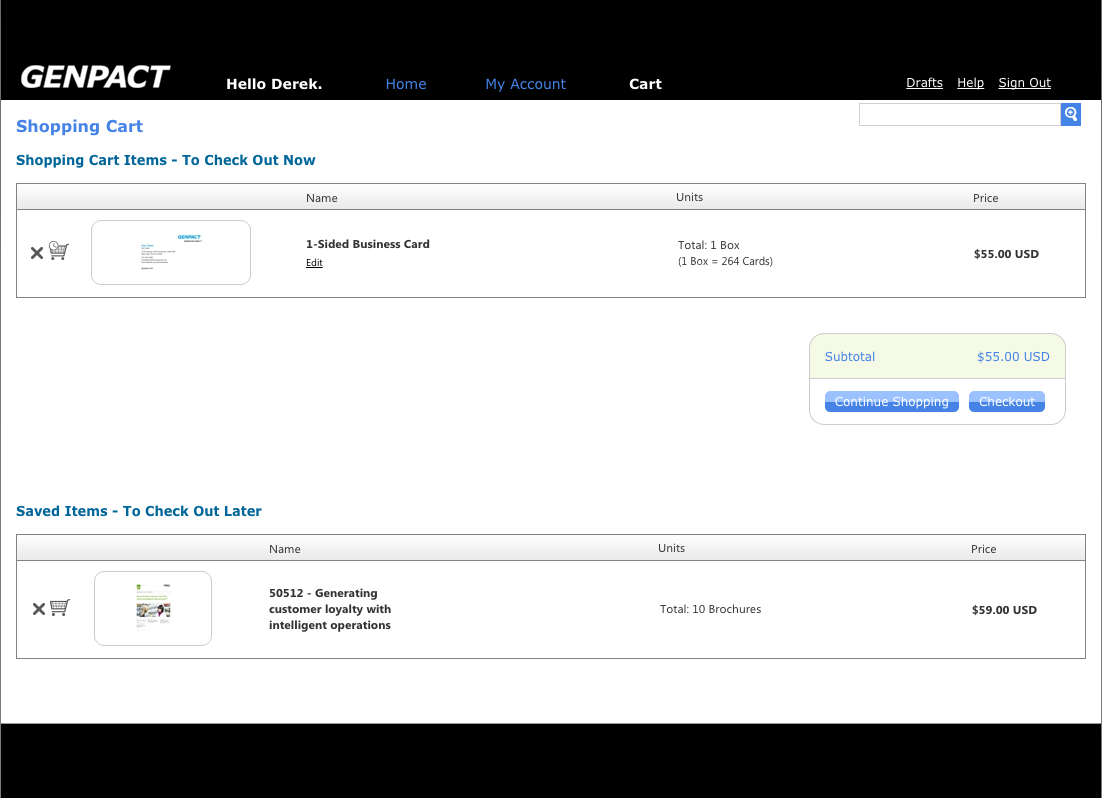
ScreenshotYou will now be taken to your shopping cart, where you can choose to either Continue Shopping, or Checkout. If you click on the shopping cart icon to the left of your product, you can save this item for purchase later.